Automotive electrical systems have become increasingly complex over the years, with modern vehicles being equipped with a multitude of electronic components. These components require a well-organized and efficient wiring system to function correctly. One essential element of this system is the wiring duct, which plays a crucial role in ensuring the integrity and performance of the electrical setup. This article delves into the importance of wiring ducts for automotive electrical systems and provides a comprehensive guide on their installation.
The Importance of Wiring Ducts
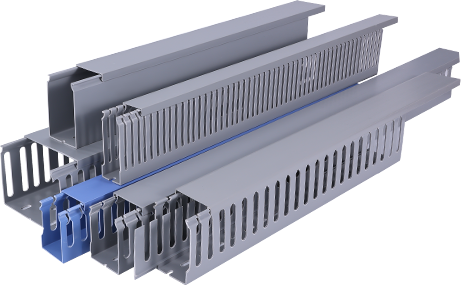
Wiring ducts are designed to house electrical wires and cables within automotive vehicles. They serve several critical functions that contribute to the overall performance and safety of the vehicle:
1. Organization: A well-organized wiring system reduces the risk of wire damage and improves the efficiency of the electrical system. Wiring ducts help keep wires neatly arranged, preventing them from tangling or getting caught in moving parts.
2. Protection: Wiring ducts protect electrical wires from external factors such as heat, moisture, and physical damage. This protection extends the lifespan of the wires and prevents potential short circuits or electrical fires.
3. Aesthetics: A clean and organized wiring system enhances the appearance of the vehicle’s interior and exterior. Wiring ducts help hide unsightly wires, contributing to a more polished and professional look.
4. Accessibility: Wiring ducts make it easier to diagnose and repair electrical issues. With wires neatly housed within the ducts, technicians can quickly identify and access the affected components without the need for extensive disassembly.
Installation Guide
Installing wiring ducts in automotive electrical systems requires careful planning and execution. Here is a step-by-step guide to help you through the process:
1. Planning: Before beginning the installation, it’s essential to plan the layout of the wiring ducts. Consider the placement of electrical components, the length of wires required, and any potential obstacles that may need to be worked around.
2. Material Selection: Choose the appropriate type of wiring duct for your vehicle. There are various materials available, including metal, plastic, and rubber, each with its own advantages and limitations. Consider factors such as durability, heat resistance, and ease of installation when selecting the material.
3. Cutting and Fitting: Cut the wiring ducts to the required length and fit them into place. Ensure that the ducts are securely fastened to the vehicle’s body and that they do not obstruct any critical components or air flow.
4. Routing Wires: Begin routing the wires through the ducts. It’s important to maintain a consistent and organized pattern to avoid any potential issues. Ensure that the wires are not twisted or pinched, as this can damage them over time.
5. Sealing and Insulating: Once the wires are in place, seal the ends of the wiring ducts to prevent moisture and debris from entering. Additionally, apply electrical tape or heat shrink tubing to insulate the exposed wire ends.
6. Testing: After the installation is complete, test the electrical system to ensure that all components are functioning correctly. Check for any signs of damage or loose connections and make any necessary adjustments.
7. Final Inspection: Conduct a final inspection of the wiring ducts and electrical system to ensure that everything is in place and functioning as intended.
Conclusion
Wiring ducts are an essential component of automotive electrical systems, providing organization, protection, and accessibility to the vehicle’s wiring. By following the installation guide outlined in this article, you can ensure that your vehicle’s electrical system is both safe and efficient. Remember that proper planning and attention to detail are key to a successful installation.
发表回复